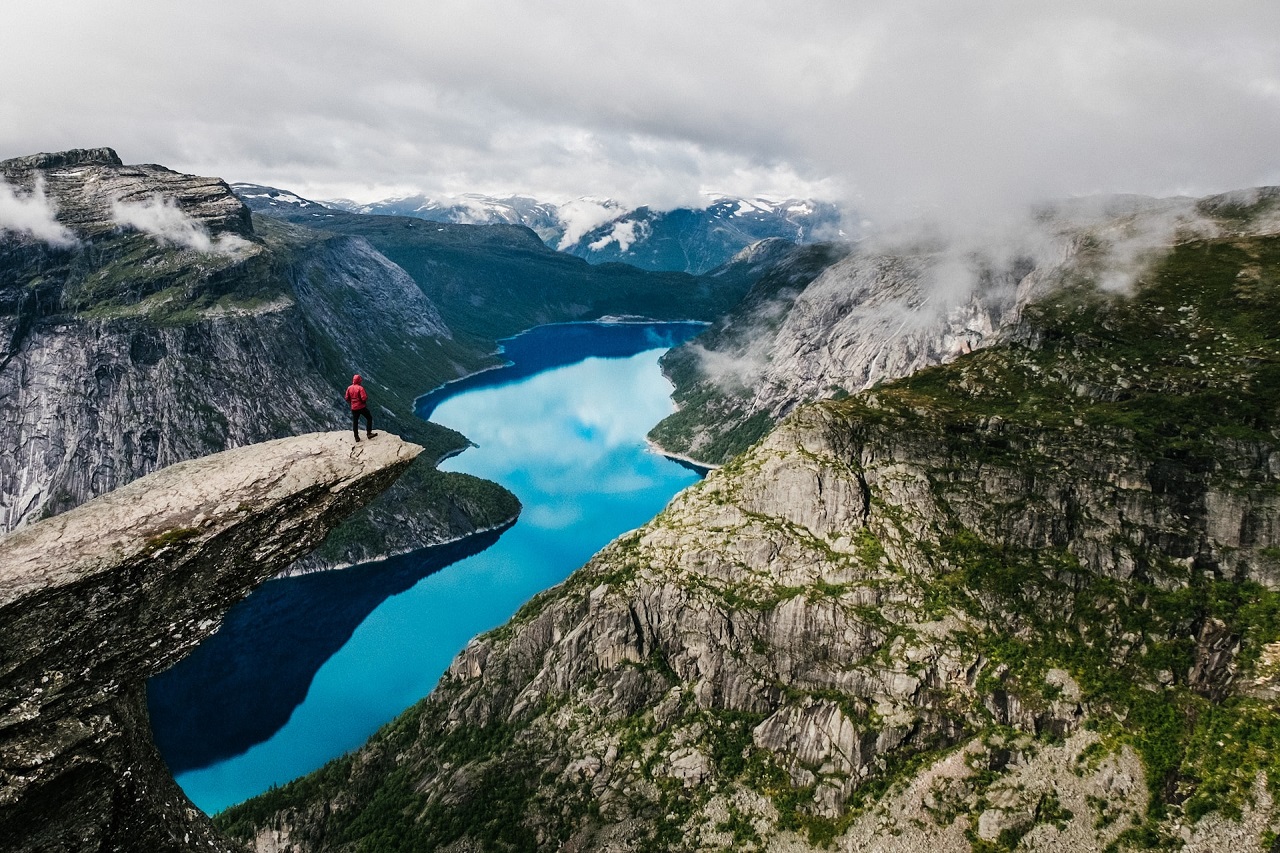
Trolltunga (“Troll’s Tongue”) is one of Norway’s most popular hikes, and spectacular photos on Instagram and other social media has skyrocketed Trolltungas popularity! But it’s far from an easy hike, and usually takes at least 10 to 12 hours in total.
People are coming to Norway with hiking to Trolltunga as their #1 reason to visit, and we’re going to give you all the details about hiking to Trolltunga in this complete Trolltunga Hiking Guide!

Unprepared tourists are a big problem at Trolltunga, and there are multiple search and rescue missions every single summer. So keep reading if you don’t want this to be you!
I want to stress that Trolltunga is a pretty difficult hike that requires waterproof hiking clothes, a certain level of physical fitness, and food and water.
You are going to be hiking in the Norwegian wilderness. There are no kiosks or places to buy food, snacks or drinks, no public restrooms, no places to get help if you get tired, or no hotels along the trail.
You need to bring everything you need for the hike, and you need to be aware that it’s outright dangerous to hike Trolltunga unprepared.
It’s an absolutely breathtaking and incredible hike if you’re prepared, but it’s definitely horrific if you don’t have the proper clothing or enough food and water.

So keep reading to learn all you need to know about hiking to Trolltunga safely and comfortably!
Trolltunga Hiking Trail Guide
The total length of the Trolltunga hike is 28 kilometers, mostly on bare granite rock without any trees or anything to shelter you from the elements. It’s quite a high elevation gain, and you need to be prepared to spend at least 10 hours on the hike.
It’s very important to start the hike early in the day to make sure you return before the sun goes down! Trust me, it’s no fun being exhausted in the dark after a long day hiking, using a flashlight to follow the trail signs.
The trail up to Trolltunga itself is well-marked, and the big crowds of people on the trail will make it super easy to follow the trail without getting lost. Just follow the red T’s to get too and from Trolltunga.

Trolltunga quick stats
- Distance: 14 km (8.7 miles) each way.
- Expected time: 10 to 12 hours in total, including rest stops.
- Difficulty: Strenuous, but mostly technically easy.
- Season: June 1 to September 30.
- Elevation gain: 800 meters (2,625 feet).
- Price: Free admission to the hike, but a 500 NOK car parking fee if you arrive by car.
Starting the Trolltunga hike
There are 3 different options for starting the Trolltunga hike. Most people begin the hike at Skjeggedal carpark where you can park your car, and where the buses stop to drop passengers off.
The first kilometer of the hike is a steep climb along the road, up to the area called P3 Målgelitopp. P3 Målgelitopp has 30 parking spots, so you can skip this 1 kilometer and 300 meters of elevation if you book a parking spot there in advance. This section is obviously a car road, so there are no challenging parts other than the elevation itself.
The start of the Trolltunga trail
Once you’re at P3 Målgelitopp, the road changes from a narrow car road to a proper hiking trail. It also flattens out a bit, so it’s a nice change of pace after that huge elevation.
The actual trail begins right next to the defunct funicular tracks.
The next part of the hike is a mix of flat mountain hike, and smaller climbs. The trail is clearly marked with red Ts that are easy to follow.
There will be parts where you need to pass over small boulders, jump over streams, and do your best at dodging mud puddles and swampy areas.
As you get further onto the mountain, the trail gradually changes from a trail to flat granite, which can be taxing on your ankles and feet.

Be sure to take breaks when you need them, and try to enjoy this long part of the hike. There are lots of scenic places to stop for a break, and the hike itself is incredibly beautiful! Remember that it’s all about the journey, not just the destination.
Getting to Trolltunga and visiting the Troll’s tongue
After spending between 4 and 6 hours hiking on the trail and granite, you’ll finally get to Trolltunga!
You will likely find that there is a huge crowd and a long queue at the top, with people waiting in line to get their photos taken on the monument.
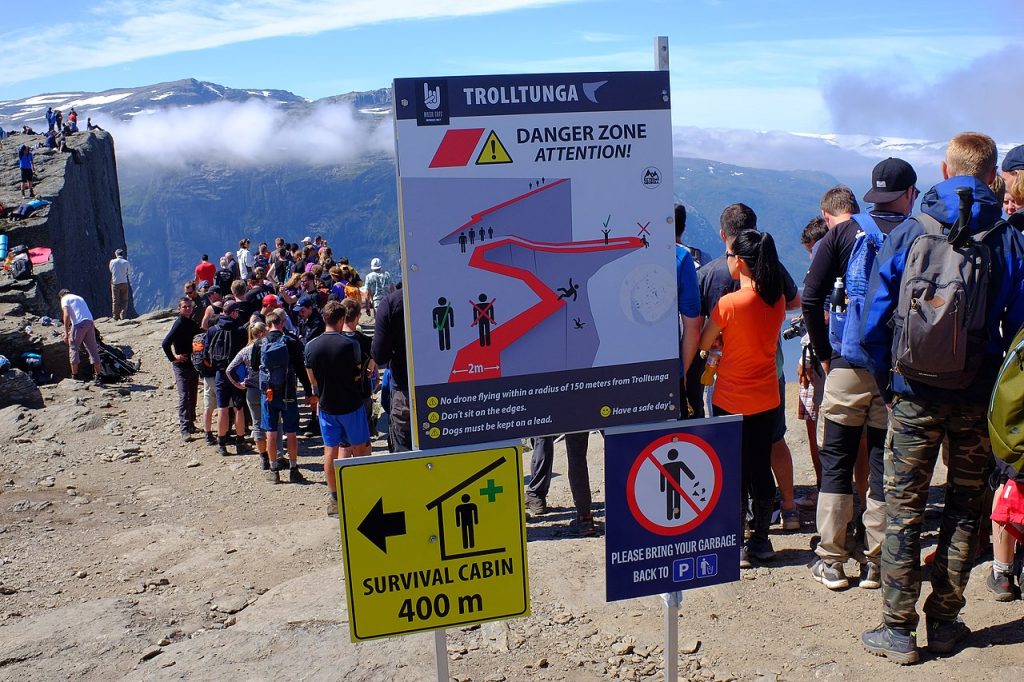
It can take anywhere from 30 minutes to a few hours to get to the front of the line and get your photo taken.
It’s generally considered very safe to go out on the Trolltunga plateau, but many people find it super scary due to the wind. However, the actual plateau is wider then it looks like in photos, so you have some leeway.
There is a single recorded death of one person who has fallen down to their death, but it’s a very rare event. Statistically, it’s very safe to go out on the tongue, but be mindful of where you step.
Hiking back down again
Once you’ve been on the plateau and gotten your photo taken, it’s time to get back down.
It’s often very cold and chilly on the top, so most people chose not to linger there for longer than they need, and you have plenty of time to relax and eat lunch while waiting in line.
The actual hike down is obviously a lot of the same since you are going to hike the same trail. It’s usually a bit less tedious down seeing as you’re in for a 800 meter descent, but it still takes at least 3 or 4 hours for most people.
Remember to take it easy and respect the trail when going down as well. Many people end up feeling anxious to get back down in the warmth of a car, and end up slipping and falling on the way down due to not paying as close attention as when going up.

Hiking to Trolltunga with a guide
There are multiple benefits of hiking to Trolltunga with a guide. I really recommend this option if you’re even the slightest bit unsure if you’re going to be able to complete the hike or not, because it’s much better to be in safe hands and get help than gambling your way to the top.
A guide will not only do the hike with you, but also help you prepare, bring extra things like emergency kits, and help you out if you’re having issues with your equipment or body.
Most of the Trolltunga guides are done in groups where you can book a place in the group, but there are also some options for those of you who are interested in having a guide to go exclusively with your party.
Some guides even offer tours where you can spend the night in a tent and see Trolltunga in the early morning hours (and thus beat the crowds!)
12 Tips for hiking Trolltunga successfully
While the actual trail to Trolltunga is fairly straight forwards, the difficulty of the Trolltunga hike makes it a challenge to complete if you don’t come prepared.
Below are some of the best tips you need to know before attempting the Trolltunga hike! These will absolutely make your hike to Trolltunga significantly easier.
1) Start early in the morning
I cannot stress how important it is to start the hike early enough!
It will be absolutely dreadful to hike down the trail in darkness, so you will want to make sure that you are back at the parking lot before the sun goes down.
This means that you should consider starting the Trolltunga hike very early in the morning. Some start it as early as 05:30 or 06:00. I would not recommend starting any later than 08:00, and even that’s a bit of a late start unless you are known for being a very fast hiker.
2) Check and double check your backpack
There are no places to stop to buy snacks or drinks along the Trolltunga hike, and you need to bring everything with you.
This means that you need to bring food for at least 12 hours, and emergency supplies like a headlight, emergency kit and a change of clothing in your backpack.
You’re simply out of luck if you forget something, and forgetting things like a waterproof jacket can absolutely ruin your trip if it starts raining (but look to tip #11 for a lifehack for forgotten items).
I suggest for you to make a list of things you want to bring along on the hike, then double check your backpack against that list before leaving your room in the morning.
If you’re unsure what to pack, refer to the packing list we got coming up later in the article. You might find out that you’re about to forget something important!

3) Be mindful of changing weather
One of the biggest challenges on the Trolltunga hike is changing weather. The trail itself tend to be pretty decent on nice, sunny days, but it gets absolutely terrible to hike on the raw granite if it’s pouring down.
The Norwegian weather can change in a heartbeat, and it can start to suddenly rain even if the weather forecast didn’t expect for it.
You need to be very mindful of changing weather when hiking to Trolltunga, and bring waterproof clothing and shoes in the case of changing weather.
Trust me, hiking on pure granite in the rain is more difficult than most people assume it to be.
4) Bring enough food and a water bottle
Not only can the Trolltunga hike last up to 12 hours, but you will also burn a lot of calories from hiking the total 24 kilometer hike.
This means that you will need to bring a lot of food, and preferably food that can be quickly and easily eaten to provide you with an energy boost.
I’ve met plenty of people who have brought too little to eat for Trolltunga and other long hikes in Norway, and trust me, it’s no fun at all to go hungry and tired without a snack or meal to bring your energy level up.
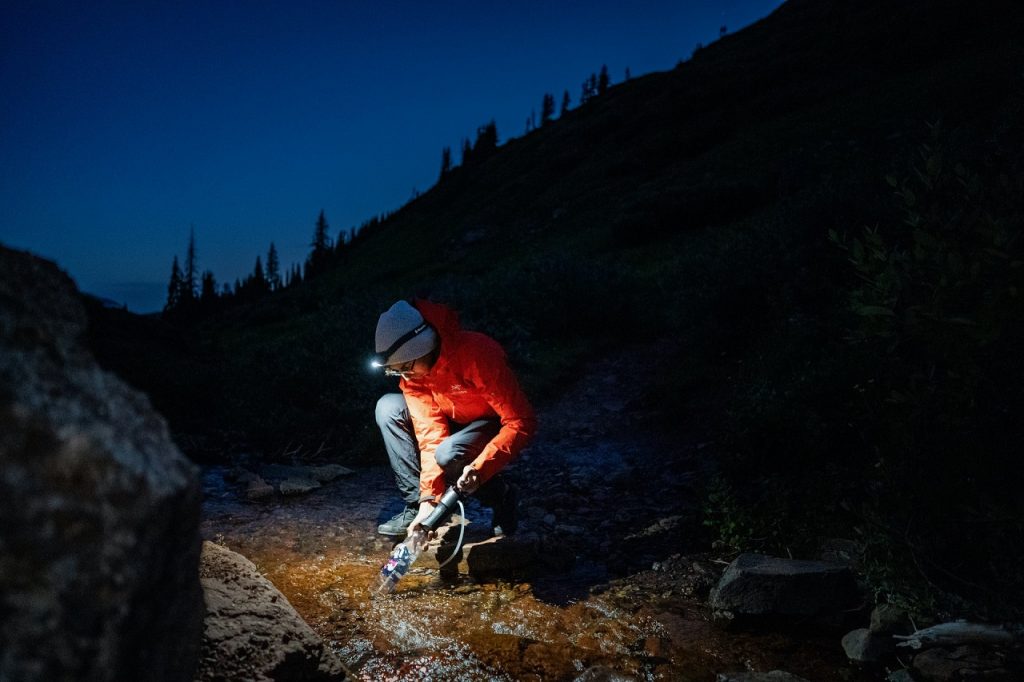
When it comes to water, don’t stress out as long as you bring a water bottle. There are plenty of chances to fill your water bottle from rivers and streams along the hike, and it’s considered pretty safe to drink water from these rivers in Norway.
5) Don’t underestimate the hike!
Many people underestimate just how challenging it is to hike for 10 to 12 hours in a single day, and think that it’s just a casual stroll.
While the hike isn’t the most technically challenging one, you will still ascend over 800 meters and will need to be very physically capable to handle the trail.
There are usually between 40 and 100 people who need to be rescued by emergency personnel every year, and this is not a fun experience for anyone involved, so don’t be those guys!
That said, if you’ve made it this far, you’re probably not one of the unprepared tourists who just assumes that everything will be fine.
6) Skip the first part of the hike to save time
You can shave off at least 1,5 hours each way if you start the Trolltunga hike from P3 Mågelitopp instead of from Skjeggedal.
While the parking lot at Mågelitopp only holds 30 cars, it’s also possible to park at Skjeggedal, then ride a shuttle bus up the first kilometer of the hike. This will save you at least an hour of walking, and 300 meters in elevation.
The shuttle bus goes between Skjeggedal and Mågelitopp every 30 minutes between 06:30 and 11:00, and cost 130 NOK for a single adult one way.
You can also ride the shuttle bus back down again, but walking down the 300 meter descent is obviously far from the same challenge as hiking up it.
7) Don’t be afraid to turn around!
One of the main mantras of hiking in Norway is to never be afraid to turn around. Sometimes your body aren’t in as good shape as you expected it to be, and other times the weather simply refuses to give you a break.
If you feel like you can’t complete the Trolltunga hike without injuring yourself or putting yourself or your party in danger, it’s much better to turn around and go back down. It’s no shame in giving up, and most Norwegian hikers have experienced this at least one time or another.
It’s not worth risking your safety or life just to get a photo for Instagram!
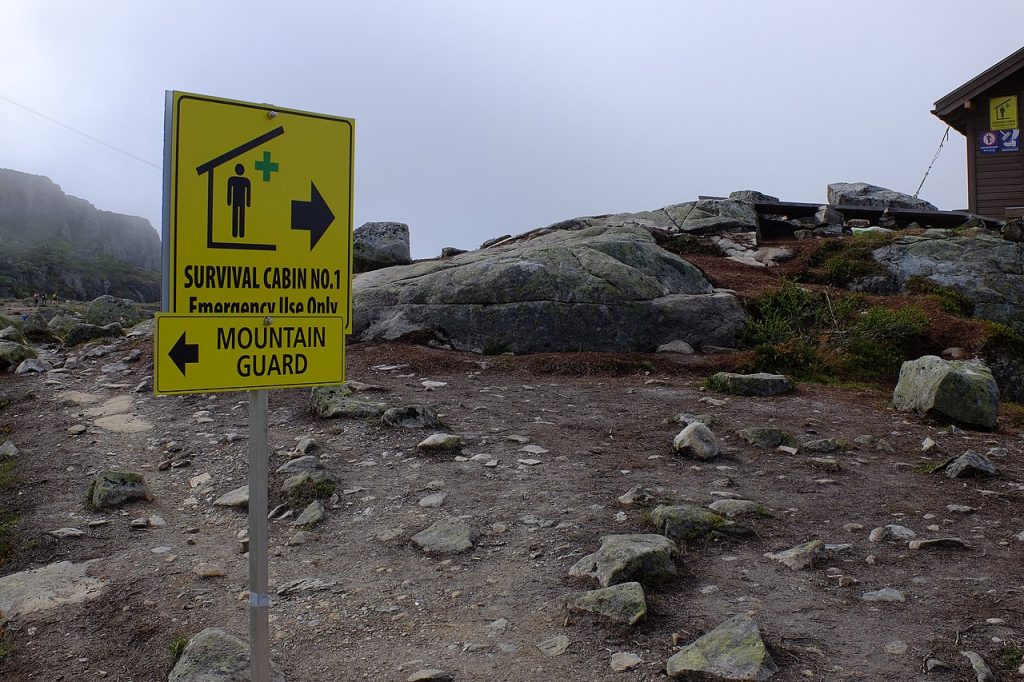
8) Use the emergency shelter if you’re in danger
There are two emergency cabins along the trail up to Trolltunga. These are only to be used in cases of emergency, and are not intended for overnight stays or anything like that.
However, feel free to use the emergency cabins in cases of emergency. Sudden bad weather, hypothermia and other problems can be very dangerous when you’re out in the open, and the emergency cabins can save lives.
9) Don’t prepare a long drive after getting back down from Trolltunga
There are lots of tourists who think it’s a good idea to drive the 3 hour drive between Odda and Bergen after having finished the hike up and down to Trolltunga, but this often a terrible idea.
Most people are super tired after a 10 to 12 hour hike, and it’s not really nice or safe to get behind the wheel for 3 hours driving on narrow and bendy roads to get back to Bergen.
I would much rather suggest to get a hotel room in Odda or somewhere nearby to spend the night after coming back from the hike. It’s going to be a much more comfortable experience this way.
10) Use the restroom in the car park before you start the hike
If you need to use the restroom while hiking to Trolltunga, then do your business at the Skjeggedal parking lot. This is your final chance of using a real restroom, and you need to find somewhere in nature if you need to do your business after this point.
Remember that the hike up to Trolltunga is mostly above the tree limit with bare granite, so there aren’t that many secluded areas to do your business, so it’s best to be finished before you start the hike.
You should also bring toilet paper with you just in case.
11) You can rent any missing equipment
Don’t have hiking shoes, a good backpack or a waterproof jacket? No worries, you can rent hiking equipment for your hike to Trolltunga!
Active Trolltunga’s store at Skjeggedal Parking Lot offers rental equipment for tourists who want to attempt the Trolltunga hike on their own, which allows you to use the equipment for the day.
Below are the 2023 rental prices for renting hiking gear from Active Trolltunga:
| Equipment | Rental price (per day) |
|---|---|
| Waterproof jacket | 250 NOK |
| Waterproof pants | 250 NOK |
| Waterproof jacket + pants combo | 450 NOK |
| Hiking boots | 350 NOK |
| Backpack | 300 NOK |
| Hiking poles | 250 NOK |
It’s going to cost you a bit if you need to rent all the equipment, but it’s a perfect solution if you forget your hiking boots at home, or realize that it’s a good idea to bring a waterproof jacket after all.
12) Listen to the mountain guards
There are mountain guards at the base of the hike (close to Skjeggedal parking lot) that will offer advise. Their job is to teach tourists how to properly dress for the hike, and what they need to bring.
All their services are completely optional, but I strongly recommend to listen to any advice they give. It is their job to teach tourists about the hike after all, so they are experts on the Trolltunga hike.
If these mountain guards give you any suggestions, take it to heart!
They are not legally allowed to stop anyone from entering the trail, but the number of rescue missions have severely been reduced after they began operating at the start of the trail.
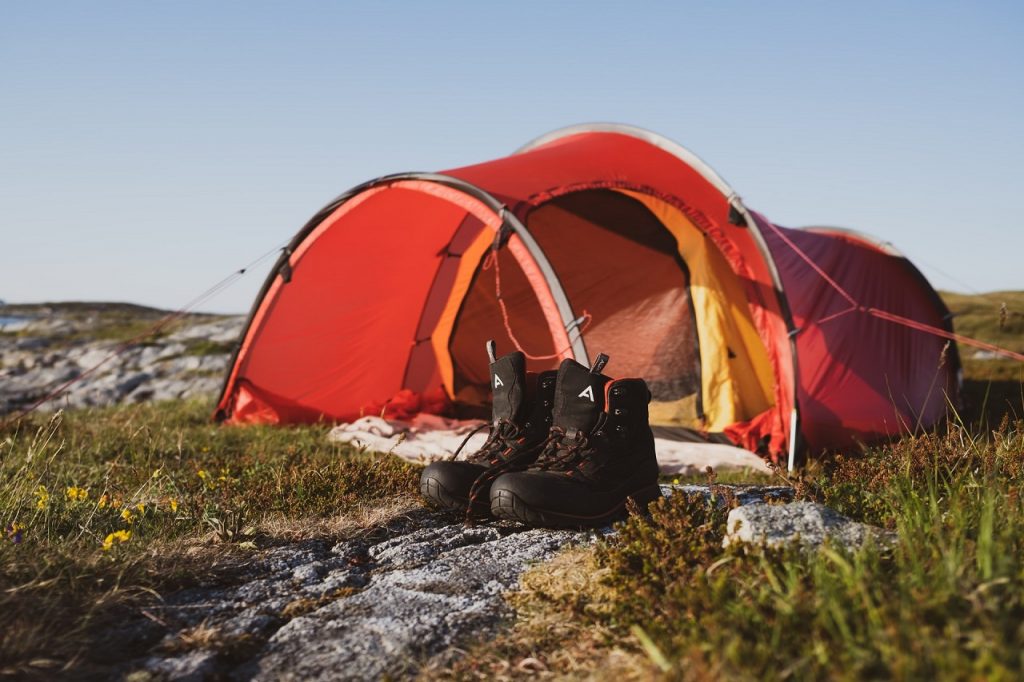
Camping at Trolltunga
It is possible to spend the night close to Trolltunga by camping. There are no campground or anything like that, but Norwegian law allows anyone to pitch a tent in the wilderness without notifying anyone. This is part of the Norwegian freedom to roam principle.
Camping at Trolltunga is quite the nice experience, and allows you to hike up later in the day, pitch your tent, and then spend the night. Then you can get up early the next morning to get to Trolltunga before any of the hikers are able to reach it.
It’s pretty cool to camp at Trolltunga, and it’s usually a very pleasant and social atmosphere of different campers who are all interested in the Norwegian nature and hiking in general.
There are recommended camping areas near Trolltunga where you can pitch your tent, so make sure to reach one of these places before you settle down for the night. The camping zones can be found at this map. The grey areas on the map are the designated camp areas, while the orange areas are the no-camp zones.
It’s also perfectly legal to pitch a tent anywhere outside of the orange zone, but there’s a good reason why certain areas as designated as recommended areas.
Trolltunga hiking season
The main hiking season is between June 1 and September 30, but this is dependent on the weather, not necessarily a certain date. However, you are generally safe to hike Trolltunga within this season, and snowfall is rare during this time period.
Remember that it’s pretty chilly in August and September, so bring more clothing if you’re hiking to Trolltunga in the fall.
Winter hike to Trolltunga
There are guided tours to Trolltunga in the winter season between October 1 and May 31. These are usually done on skis or on snowshoes.
I would really not recommend anyone to do this hike alone without a guide unless you are super experienced with winter hiking.
Hiking to Trolltunga outside of the main season is straight up dangerous for most people!

How to get to Trolltunga (from all the major cities)
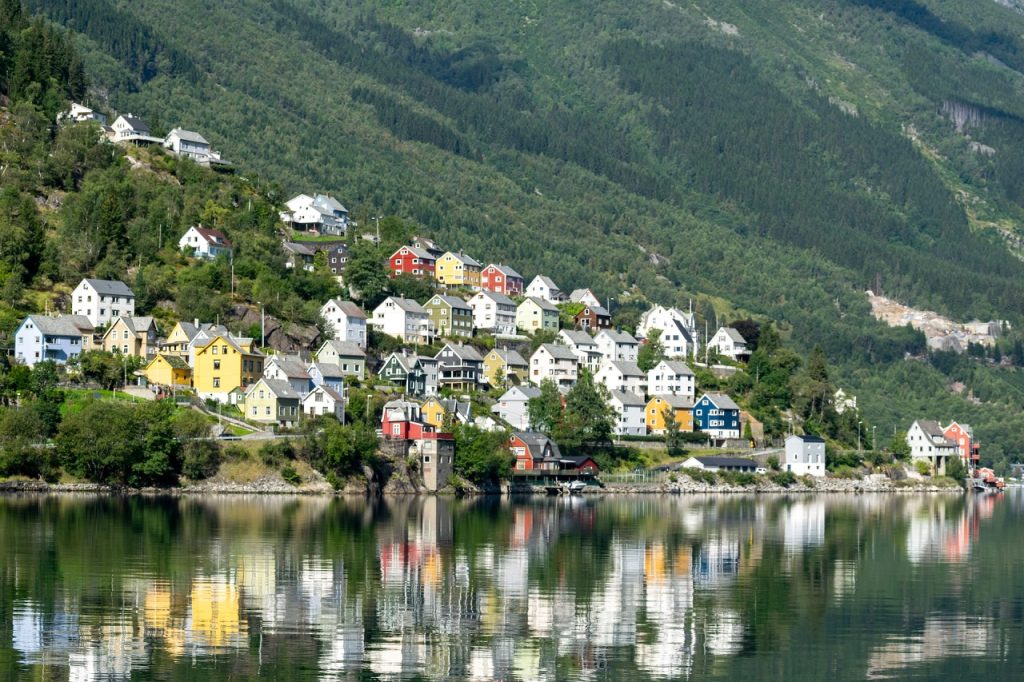
The starting point for the Trolltunga hike is close to Tyssedal, which is a very small village very close to the town Odda.
When you’re going to hike Trolltunga, you’re first destination will be Odda. The road signs and public transportation will also have Odda as its destinations. Odda is only 8 minutes away from Tyssedal and 19 minutes away from Skjeggedal parking lot.
There are shuttle buses between Odda and Skjeggedal, so you will want to head to Odda first when going on a hike to Trolltunga.
How to get to Trolltunga from Oslo
You can get to Odda pretty easily from Oslo, either by car or public transportation.
By car: If you’re driving yourself, drive E18 south towards Drammen, then change to E134. Follow E134 for close to 4 hours until you get to Skare, then change to Rv13 for the final stretch of the journey.
Total drive time from Oslo to Odda is roughly 5 hours and 15 minutes. It’s a very nice and scenic drive, so take your time and enjoy yourself!
By bus: There are buses that goes between Oslo and Bergen that stops at Odda. The most used one is called “NW180 Haukeliekspressen“, which is run by the company Nor-way.
You might have to change your bus at Seljestad, but the bus driver will tell you if this is the case for you.
By train: Some people claim that you can ride the train to Odda to get to Trolltunga, but there are no train stops in Odda (or any railways close to it).
If you want to get to Odda by train, you need to ride the train from Oslo to Bergen, then get on a bus in Bergen. This is going to be an expensive and time consuming journey.
How to get to Trolltunga from Bergen
Bergen is roughly 3 hours away from Odda, and there are multiple options for getting to Odda.
By car: The driving directions between Bergen and Odda are a bit difficult at times, so I recommend using Google Maps or a GPS device. The entire journey takes around 3 hours in total, and includes a ferry between Tørvikbygd and Jondal.
If you don’t bring a GPS, don’t worry though. Odda is a pretty big town, so there will be signs towards Odda for most of the way, so it’s actually pretty easy to follow the directions just from that.
By public transporation: There are buses between Odda and Bergen, and the easiest and cheapest option is to ride the train route R40 to Myrdal, then change to the bus line 990 between Myrdal and Odda.
Both of these are local lines that operates all day long.
There are also tour buses that goes directly from Bergen to Skjeggedal, but these are more expensive than the regular public transportation tickets.
Getting from Odda to Trolltunga (Skjeggedal parking lot)
We’ve covered how to get to Odda, but how do you get from Odda to the start of the Trolltunga hike? This is far from as difficult as it seems, seeing as there are shuttle buses between Odda and Trolltunga all day long.

So just get on one of these shuttles buses, and you’ll be ready to start the Trolltunga hike in under 20 minutes!
If you’re driving a car, just follow the signs towards Trolltunga. It’s very easy to find the right way, and plenty of signs.
What to pack for your Trolltunga hike
This section will contain some suggested items to wear or pack in your backpack when going on the Trolltunga hike. If you want to bring all this is not is entirely up to you, but I would personally much rather carry a bit heavy backpack than needing items that have been left at home.
- Waterproof hiking boots. Hiking boots are a must for such a long hike, and parts of the Trolltunga hike will be in wet and muddy conditions, so they are much better suited for the trek if they’re waterproof. I suggest using hiking boots with ankle support to prevent injuries such as getting a sprained ankle.
- Waterproof backpack. You are best off with a waterproof backpack, or a backpack with a waterproof cover. You never know when it’s gonna rain.
- A waterproof jacket with wind protection. The Trolltunga plateau will be super windy, and pretty cold on most days – even in the middle of summer. You should absolutely bring a jacket, and a waterproof one is best suited seeing as there’s always a chance for rain.
- A water bottle. You simply cannot do this hike without a water bottle. There are plenty of opportunities to fill it up with water from smaller streams and creeks, so a single water bottle is enough.
- Plenty of food. You will burn a lot of calories from the 10 to 12 hour Trolltunga hike, so you better bring enough food to replenish your losses.
- Snacks that provide quick energy. A quick and calorie-rich snack is always nice when you’re starting to feel fatigued after hiking for multiple hours. A few bananas, a bar of chocolate, sport gel or anything else with a high carbohydrate composition is recommended. The snacks will taste absolutely wonderful and energizing when you’re starting to feel fatigued!
- Thermal underwear. It can be very cold at the trail to Trolltunga, and I recommend bringing along woolen underwear or another type of thermal underwear. This is typically very light and super nice to have in your backpack in case you start freezing. You can get hypothermia very quickly in cold, windy and rainy situations up on the mountain, so bringing woolen underwear can absolutely be worth it.
- Toilet paper. If you need to go to the toilet in nature while hiking to Trolltunga, make sure to have toilet paper with you, and a plastic bag to take it back with you.
- A trash bag. There are no trash cans or anywhere to get rid of your waste when hiking to Trolltunga, so make sure to have an empty plastic bag in your backpack where you can stove away your waste. Please do not litter in nature if you’re visiting Norway! Thrash can be thrown away at Skjeggedal parking lot when you get back down.
- Camera. While modern cell phone cameras are getting incredibly good, I really recommend bringing a DSLR with you if you have one. The entire hiking trail will be filled with amazing photo opportunities!
- Emergency kit. You will absolutely want to bring a small emergency kit with you on a hike as long as this one, just in case. There will always be a risk of injuries when hiking in nature, and an emergency kit can be super handy to have.
- Blister band-aids. If you aren’t too familiar with hiking in your hiking boots, bring a few blister band-aids with you. Hiking for multiple hours with blisters on your feet is no fun, but a band-aid can make life much easier.
- Sunglasses and sunscreen. There is very little shade on the hiking trail to Trolltunga, so you will definitely want to bring sunglasses and a bottle of sunscreen with you. The Norwegian summer sun be be burning hot!
- Spare clothing. You never know what could happen, and a spare t-shirt or shorts can be pretty nice to have in reserve.
- Full batteries for your phone. You will want to start the Trolltunga hike with a full cell phone battery. It’s very important to be able to call for the emergency services if something goes wrong.
- Powerbank. I always prefer to bring a powerbank with me on my hikes, just in case I end up draining my cell phone battery and end up with an emergency situation. This is one of those items you probably won’t need, but a real life saver if you end up needing it.
- Headlamp. It’s very important to bring a headlamp with you in case you end up getting stuck at the trail after the sun goes down. It will be absolutely pitch black a little while after the sun sets, and almost impossible to finish the hike without a headlamp. I urge everyone to bring a headlamp with you no matter if you plan for returning late in the day or not, because it’s going to be a life saver if something happens and you’re stuck on the trail after dark.
The Via Ferrata mountain climb at Trolltunga
Do you find the regular 24 kilometer hike to Trolltunga too easy? In that case, how about trying Via Ferrata Trolltunga climbing trail?
The Via Ferrata climbing trails are climbing routes that have been filled with iron bars and other safety measures to allow you to complete the entire climb while being attached to the mountain wall. This allows for much safer mountain climbing.
There’s a full Via Ferrata climbing trail at Trolltunga where you can climb the 250 meters up to the mountain plateau. You don’t need previous mountain climbing experience if you’re bringing a climbing guide (which you should unless you are a very experienced climber).
You need to hike for multiple hours to get to the Via Ferrata, so it’s a pretty cool challenge!
I haven’t done the Via Ferrata myself, but I hear that it’s an incredible experience.
Trolltunga weather forecast
It’s highly recommended to check the weather forecast before starting your hike to Trolltunga, which will give you an indication as to what weather and which temperatures to expect.
The weather forecast for Trolltunga can be found at Yr by clicking here.
It’s important to keep in mind that the weather forecast is not a guarantee, so prepare for the worst case scenario no matter what the forecast tells you.
Frequently asked questions about the Trolltunga hike
Can you hike to Trolltunga with children?
Yes, it’s definitely possible to hike to Trolltunga with children if they are experienced hikers. There are plenty of people who bring children over the age of 9 or 10 up to Trolltunga, but few bring children that are younger than this. However, the hike is even more challenging for a child, so it’s not recommended unless they are experienced with hiking!
How long is the queue to get your photo taken at Trolltunga?
The queue to get your photo taken at Trolltunga can be pretty long, and typically ranges between 30 minutes and 2 hours during the high season. So be prepared to spend a long time in queues.
When is the Trolltunga hiking season?
The Trolltunga hiking season begins on June 1st, and ends on September 30th. Anything outside of this is considered the off-season, and is a much more challenging hike.
Do you need to physically exercise to hike Trolltunga?
Whether or not you need to physically exercise to get in shape for Trolltunga depends on your current physique. If you’re unfit and not used to going on hikes, then you should definitely exercise to build some cardio before you attempt such a challenging hike. The elevation and sheer length of the hike will be very demanding on your body, especially if you are unfamiliar with hiking.
How much does it cost to park at Trolltunga?
The parking fee at Skjeggedal parking lot is 500 NOK per day. However, if you want to park at Mågelitopp, you will have to pay 200 NOK at the toll booth, then 600 NOK for the parking (800 NOK in total). So it’s pretty expensive to park at the Trolltunga parking lot.
Can you see the fjord from Trolltunga?
You can not see the fjord from Trolltunga. The body of water you can see down below is actually Ringedalsvatnet, an inland lake.
Can you arrive at Trolltunga by helicopter?
It’s possible to charter a helicopter flight to see Trolltunga from the air, but there are no areas close to Trolltunga where it’s possible to land for the helicopter, so you cannot get to Trolltunga from helicopter. The only helicopter landing site is reserved for emergency helicopters.
How long is the hike to Trolltunga?
The hike to Trolltunga is 14 km each way, meaning that the entire hike is a total of 28 kilometers (17.4 miles). Most people spend between 10 and 12 hours to hike to and from Trolltunga in total.
How many people hike to Trolltunga on a given year?
There are usually around 50,000 to 60,000 hikers that reach Trolltunga in a year, and the hike is considered one of Norway’s most visited natural tourist attractions. Trolltunga has gained a lot of popularity in the last 5 years due to Instagram and other social media.
Is it safe to bring a dog on the hike to Trolltunga?

It’s considered OK to bring a dog on the hike to Trolltunga, but only if you can adhere to the regulations that apply for dogs in Norway. This means that you must keep the dog in a leash at all times, and pick up its waste.
Is there cell phone reception at Trolltunga?
There is full coverage for cell phone reception for the entire Trolltunga trail hike. This was added in 2016 as part of a safety measure, so the entire trail will now have good reception (including 5G).